It's Momma's Birthday tomorrow, and this is her Birthday cake. No tutorial here, not that you need it! Just chocolate butter cream, magic stars and chocolate buttons. I'm sure it'd look even cuter with white chocolate, try it out! xx
Thursday, 16 May 2013
Wednesday, 15 May 2013
Leather Headband with Studs
This is a little leather head band I whipped up for Bea as she's queen of the super-goths. I also made myself a skinnier one for pushing back the sweat-fest fringe at Glastonbury, laaadies.
What you'll need:
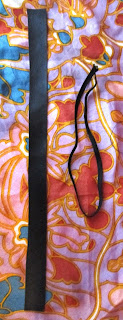
- One strip of leather/pleather or if you fancy, some sturdy ribbon
- Elastic (about 20p a bundle in good fabric/craft shops)
- Strong thread (i'm using denim thread)
- A needle
- Fabric scissors
- STUDS.
Step one: measure the material to reach from ear to ear over your head, then measure the elastic the opposite way, then minus roughly 5cm-7cm.
Step two: thread your needle, fold the thread in half and tie at the end, this makes it stronger than a single thread that you'd usually use.
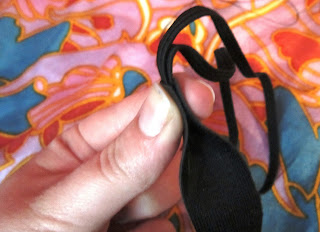
Step three: fold the end of the material in half with the elastic sandwiched in between. Use the two loose ends of the folded elastic first...
...and sew all four layers together.
Step four: repeat on the other side.
The basic head band is now done, WAHOO.
Now for the golden icing...
Press the studs in with your thumb and flatten them at the back with a tea spoon/pen/cuticle pusher
keep checking after each stud to check the distance is in proportion
Now wear it around the house like a damn sexy pirate.
Have fun! xx
Sunday, 12 May 2013
Jeepers Creepers, Festival Peepers!
These sunglasses were so easy to pimp and so much fun to wear, so I made another pair this afternoon. All you need is:
- 1 pair or sunglasses (the top pair were £3 from M&S and the bottom are an old £2 pair from Primark)
- Some stick on gems (£1 per pack at Tesco)
- All purpose glue
- ...and if you want, some glitter
Step one: Pick out and organise the gems you want to stick on, play with patterns and ideas until you create a solid design.
Step two: Apply glue to the first eye and attach gems
(...make any minor adjustments if you need to while the glue is still tacky)
Step three: Repeat on the other side!
Have fun! xx
Cute handmade card in under 5 mins
I love making this card for Birthdays as it is SO quick and easy but at the same time super cute. The origami heart is also good for using as tags on presents or as a romantic little post-it note (okay, i'll stop now...)
What you will need:
- 1 Blank card + envelope
- 1 Square of thin coloured paper (Origami paper works best)
- Glue (Pritt-stick, all purpose, or even double sided tape)
- Scissors
Step one: Fold your paper square in half
Step two: cut the paper into two triangles, take one of the triangle and fold the corners into the top point to create a square
Step three: flip your square over and fold the flap back to meet the point
Step four: fold both top parts down (it's beginning to look like a heart now!)
Step five: Now neaten it up by making small folds at the top and side
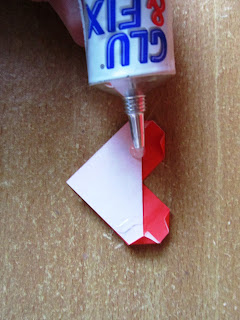
Step six: Add glue/tape and stick onto the card
Step seven: Stand back and admire :)
So now you've mastered the basics you can play around with sizes and colours or keep it classic xx
Subscribe to:
Posts (Atom)


