Just a quick inspiration post! These little cuties are recycled mini Body Shop body butter tubs (wow, alot of adjectives there). I just cleaned them out with hot soapy water and used gems and all purpose adhesive to stick them on. These are the perfect size for holding my gems, buttons, mini sewing kit and god knows what else.
Love these little storage options for Uni!
Have fun xx
Wednesday, 14 August 2013
Monday, 5 August 2013
DIY Colour Block Necklace
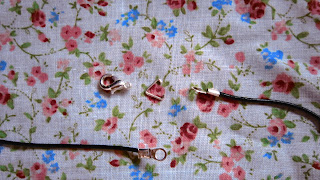
It's August and I'm prepping for my summer holiday which means bright warm colours and big ass beads! These beads were upcycled from an old necklace I really hated, it was too long and the beads tortured my hair by pulling out chunks at the back, not cool. This new design is so much better, I love wearing leather/pleather as it sits on the skin so much nicer than metal! All you need for this little number is:
- Wooden beads
- Leather string
- 1 Clasp
- 1 Finding
- 2 End caps
First of all, clamp the end cap on one end of the leather. Make sure it's secure and that the string can't rotate.
Then lay out the beads in the pattern you want, then slide them onto the string.
Once you've done that fix on the final end cap then secure the finding to the end cap and clasp.
Voila! This is going to look ace with a bright lipstick and some wedges or even just a colour block bikini. Have a great summer and have fun! xx
Friday, 2 August 2013
Keyring Earrings!
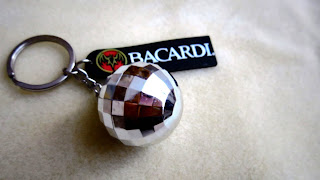
Times are getting hard, money's getting tight and the last thing I'm spending my money on is jewellery. But who needs to when these beauties were practically free and so much FUN! These key rings were given away whenever my mum bought a rum and coke on holiday. Shame she didn't drink much or I could have made a matching necklace, but let's put them to good use!
All you need are earring hooks, findings, pliers and two fun (or boring?) keyrings. If you don't want to buy the fiddly bits you could always disassemble an existing pair that you've grown to loathe. stretch the finding out and slip the hook and keyring together then close it back up.
That was so easy, it was almost weird right? So get the tools out and get cracking! I want to see plastic aliens, tassels and plenty of kinder-egg-esque designs hanging from those lobes. In the meantime I'll be hitting the disco like a mad thing, so have fun! xx
Sunday, 14 July 2013
DIY make-up drawer
- One set of tatty (or not) wooden drawers
- Paint (Preferably wood paint, or acrylics)
- A Sponge
- Patterned paper
- PVA glue
- Varnish
First of all remove the drawers and paint the exterior by dabbing it with the sponge (removing excess paint before sponging). If you lay it on too thick then the finish won't be as great and it'll need three or four coats to get an opaque finish. (Be careful not to paint inside the space where the drawers will go as this could cause the drawers to stick.)
Have fun! xx
Wednesday, 3 July 2013
Review Time: Asda Skin System VS Vaseline Essential Moisture
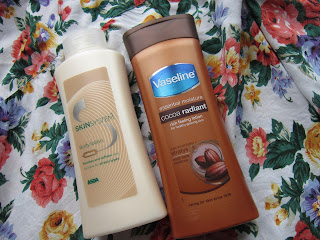
Betty, doing a beauty product review? Yeah it's happening! Essentially, I've got back from Glastonbury (wahoo!) and my whole body is in recovery (including my skin). I've always wondered if there was actually any difference between the own brand and the big name labels or is it all just the packaging? A quick glance at the label shows some major differences in the ingredients, I'm intrigued and so the experiment begins:
Asda Cocoa Body Lotion 87p, you're up:
Texture: It's so oily, it slipped right out of the bottle! It reminds me of something from a cheap children's bath set and I don't want to even put it on.
Smell: It's pretending to be cocoa, it smells like it looks; cheapcheapcheap.
Application: Once you've rubbed it in it's not so bad, although it does slide around like sun tan lotion to start with!
Vaseline Cocoa radiant £3.50, let's go:
Texture: It's firmer and creamier, a lot less oily and a lot more appealing compared to Asda's body lotion.
Smell: The smell is denser and smells more like a cocoa butter than the Asda version. This texture/smell combination makes it more reassuring and usable!
Application: Goes on like a dream, it's not being pushed around. It's a proper moisturiser.
Verdict: Vaseline wins the challenge hands down. After it's been applied, it lasts longer and the skin's texture is smooth, unlike Asda's stickier and drier feel. Spend the extra £2.43, it's well worth it!
Betty xx
Sunday, 23 June 2013
Quick Pre-Glastonbury Post
Hey guys! It's been a while so I thought I'd share one of the easiest but most eye-catching hair accessories I've ever made. It's water resistant, light weight, made in minutes and well... supposed to go in your pond!

This little beauty was £1.20 from the garden section at 'The Range'. Team it up with some all purpose glue and a wide tooth hair slide and voilà, we're half way to Paloma Faith. I love wearing it with a beehive hair support, hopefully this will distract from my oily festival hair.
Have fun xx
Sunday, 2 June 2013
Chillin' with my Gnomies
In my garden are was a pair of old, sad gnomes hiding in the foliage. They've been there since before I was born and for years my parents have nursed the idea that they will one day restore them. I decided to finally give these little guys a make over, I think they deserved it!
Here goes:
First of all I scrubbed them down and gave them a coat of outdoor primer (see pic). I then designed their outfit colours and bought the paint. These paints were bought at B&Q and more pricey than I'd like... but hey, this is a sentimental project (and my step dad said he'd pay!) However, you can use acrylics which you can pick up for about £1-£2 a pack with more colour variety but they might fade/chip a bit quicker if the gnomes will be outside.
Then get painting!
I chose classic red hats twinned with green and blue garments, I also gave them some gold accessories. I did really wanted to go with some pastel colours and ginger beards, but as these guys are so old and beloved I had to keep it classic... maybe next time!
When you've finished, give them a coat of clear varnish and hide them in the shrubbery, on your door step or window box. I think when I go to university these little guys will have to come and visit Brighton (like in the film Amelie)
Have fun! xx
Subscribe to:
Comments (Atom)


